
The timer sounds. Half the class starts moving, two students are still asking where the materials go, and someone has reached the next table without the notebook they need. A louder countdown will not necessarily solve this problem. The missing piece may be a transition routine that students have never been explicitly taught.
How can a teacher make an activity change predictable while keeping the focus on readiness rather than speed?
Identify the uncertain step before changing the signal
Watch one ordinary transition and jot down where uncertainty begins. Do students know how to stop the current task? Where should unfinished work go? Which materials travel with them? What should they do on arrival? A transition can fail at any of these points even when students hear the signal perfectly.
Use a simple four-part structure: finish, store, move, start. The wording can change for the age group and room. Its purpose is to give the teacher a planning check and students a visible sequence. It is not a demand for every child to move or respond in the same way.
The IES overview of classroom-management strategies recommends attending to the classroom environment and explicitly teaching skills through examples, practice, and feedback. Our routine below applies that general principle to one common classroom bottleneck; it is not a separately evaluated program.
Build one transition slide students can actually use
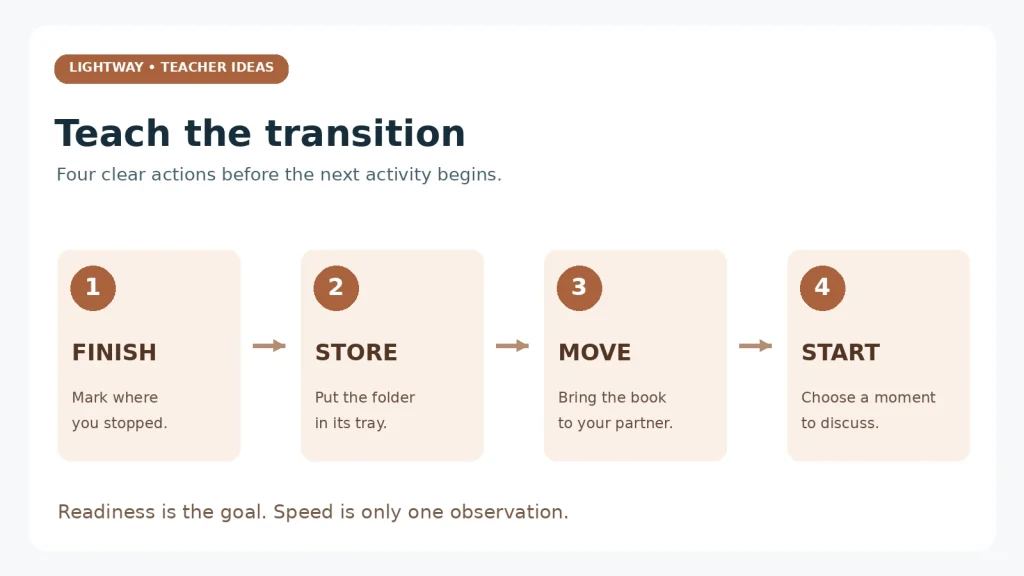
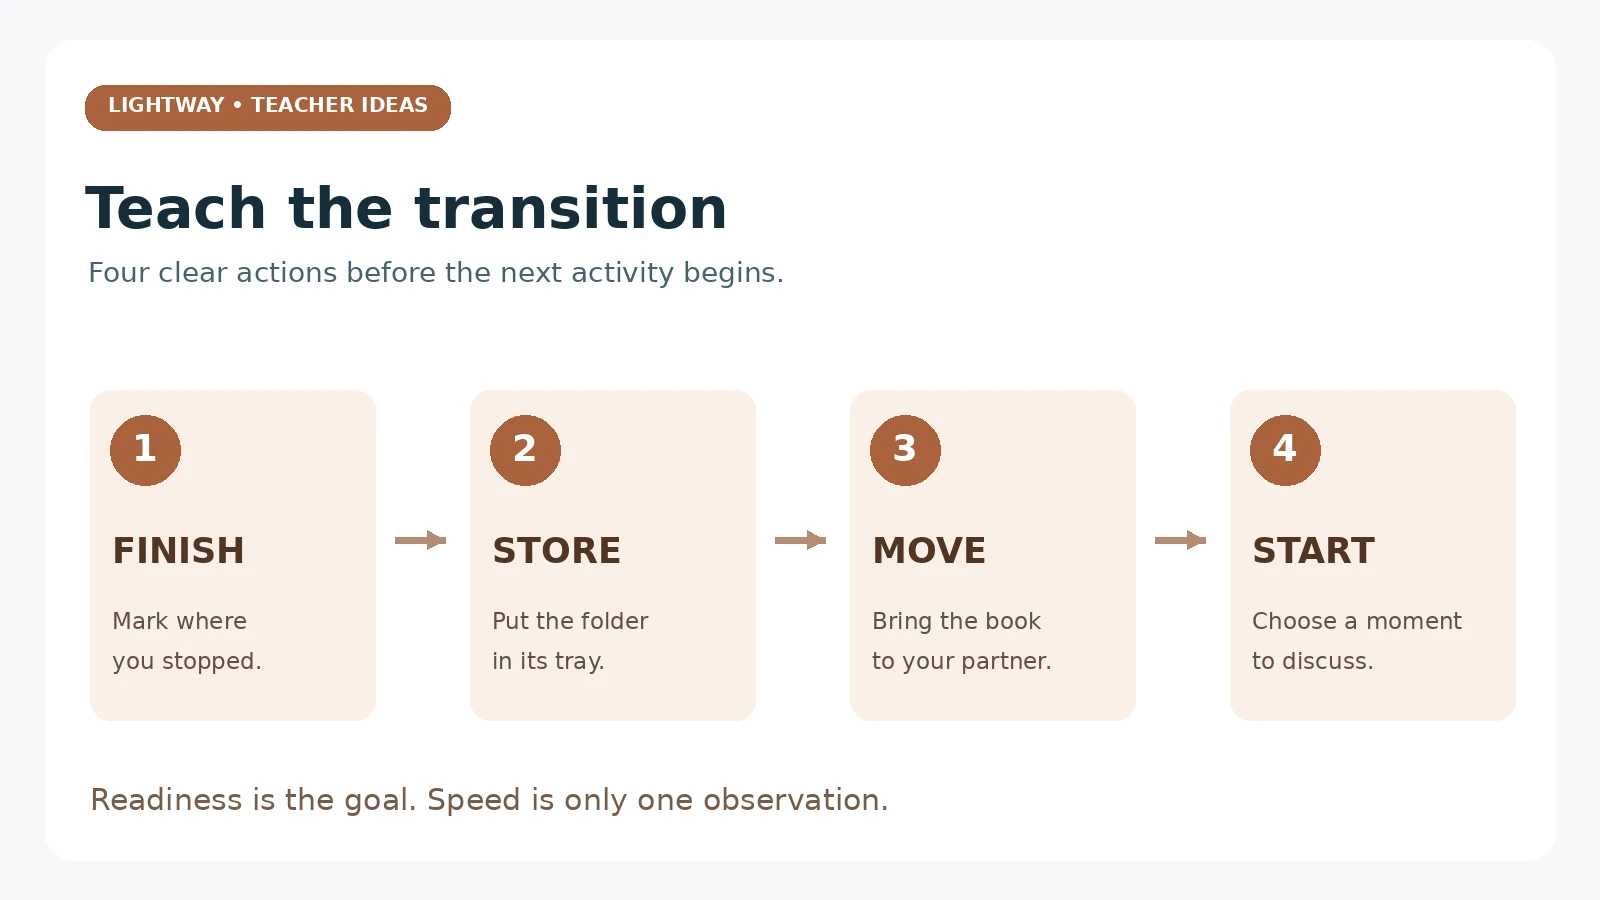
For a move from independent reading to partner discussion, display:
1. Finish
Place a bookmark where you stopped.
2. Store
Leave the reading folder in your tray.
3. Move
Bring your book to your assigned partner space.
4. Start
Point to one moment you want to discuss.
Read the directions aloud the first time. Pair each step with a clear icon or demonstration. “Be ready” is too broad if readiness has not been defined. Here, readiness means having the book open and a moment selected. A student who arrives quickly but cannot begin still needs support.
Keep only the directions needed for this change on screen. A crowded slide that combines the day’s schedule, a behavior chart, an inspirational quote, and a countdown can bury the next action. Leave the slide visible until the class has started the new task.
Teach it while the room is calm
- Explain the purpose. “We are practicing how to change tasks so everyone knows what to bring and how to begin.”
- Model the whole sequence. Walk through it with a book and folder. Say the decision aloud: “My folder stays here, but my book comes with me.”
- Invite students to identify the steps. Ask which item moves and what happens first on arrival. A check before movement prevents a predictable traffic jam.
- Rehearse once in a manageable group. Give other students an observation job, such as checking whether the starting task is visible. Do not use a child’s mistakes as the public demonstration.
- Give specific feedback and adjust. “The tray label was hard to see; I will move it.” Then practice the actual routine, not a punishment loop.
IES guidance on supporting early learners’ transitions to school also highlights modeling and rehearsing routines. Although that resource addresses younger learners, the planning question remains useful with older classes: have I taught this procedure, or only announced it?
Make the timer a support, not the learning target
A timer can make a waiting period visible. It should not become a race that rewards rushing, penalizes a mobility need, or creates anxiety for students who require more processing time. Start by observing how long an orderly change actually takes in your room. If a timer is helpful, explain what it means and give a quiet warning before it ends.
When the time is up, diagnose rather than assume defiance. A child might be unable to find the tray, need help saving work, or be waiting for a blocked walkway. Changing a room arrangement can be more useful than repeating a warning.
Troubleshoot the actual bottleneck
Four common problems and a targeted adjustment
Students keep working: teach a stopping point and show where unfinished work is kept. Everyone queues for one container: distribute storage points or stagger a role. Students arrive without materials: use a carry/stay visual and rehearse it. Students arrive and chat because nothing is ready: put a short first task on the destination slide. Each adjustment addresses a different problem; louder signals do not address all four.
Plan for access before asking for independence
Use a visual cue as well as an audible one. Keep accessible routes clear. Offer a student who needs additional time a discreet earlier cue or a planned alternative. Do not display individual accommodations on a public slide. For a multilingual learner, demonstrate the action and use consistent words; changing “put away” to “pack up” to “clear off” every day may add unnecessary language demands.
Allow students to suggest a clearer icon or phrase. If the procedure depends on a classroom helper, specify what happens when that person is absent. A dependable routine should not collapse because one child is missing.
Check success with two observations
After several uses, ask: Can students explain the next step? Can they begin the new activity with the support available? Record recurring questions and the point where the teacher still has to intervene. Transition time is one piece of information, but fewer minutes alone do not show that the change is more accessible or productive.
For reusable visual directions, Lightway’s classroom transition slides provide a related planning option. Adapt the wording to your actual room and routines. A projected template becomes useful when students have practiced what its directions mean.
An agenda tells students where the lesson is going; a transition explains how to get there. Our daily-agenda guide covers the broader schedule, while this exit-ticket routine helps distinguish unfinished work from a misunderstanding at the end.
